
How to Add a DNS TXT Record #
A TXT record is commonly used to verify domain ownership or configure services such as Google Workspace, Microsoft 365, email authentication, SSL validation, and other third-party platforms.
This guide explains how to add a DNS TXT record using the DNS Management service available inside the Q Host Client Area.
Before You Begin #
To manage DNS records through Q Host, both of the following requirements must be met:
- DNS Host Record Management must be activated for the domain.
- The domain must use the following default Q Host nameservers:
ns1.qhost.qa
ns2.qhost.qa
ns3.qhost.qa
If the domain uses nameservers from another hosting or DNS provider, any records added through the Q Host DNS Manager will not take effect. In that case, you must add the TXT record through the provider currently managing your domain’s DNS.
Step 1: Log in to the Q Host Client Area #
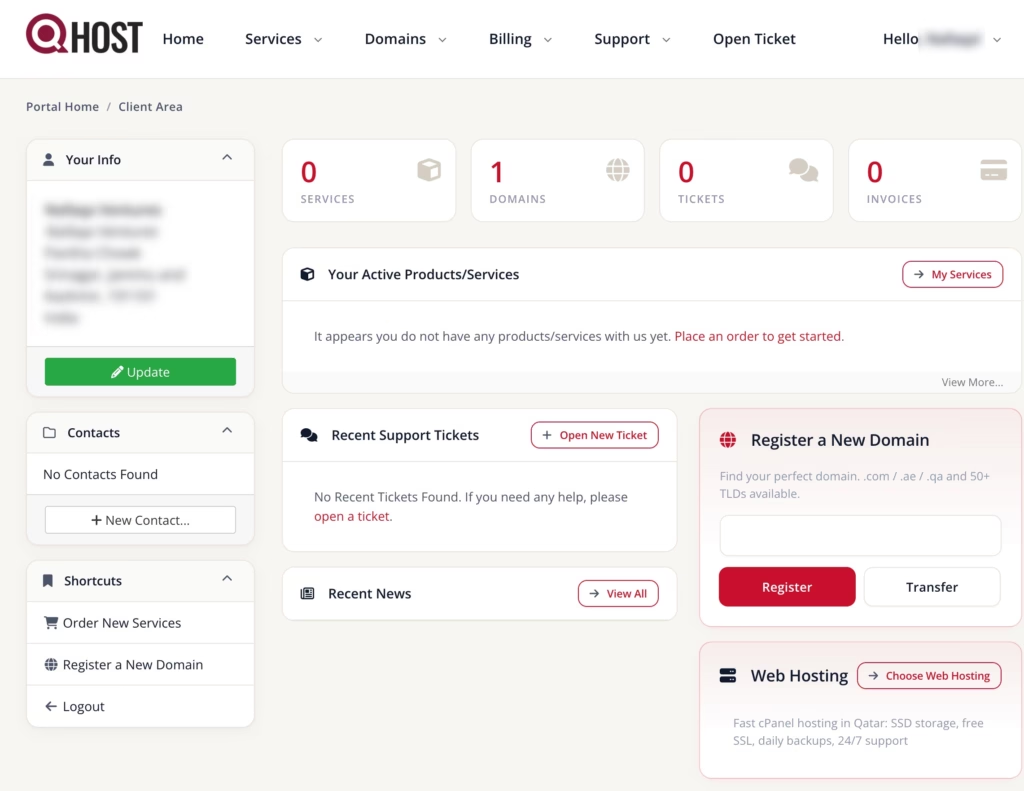
Visit the Q Host Client Area and sign in using your account credentials.
Screenshot: Q Host Client Area home page.
Step 2: Open My Domains #
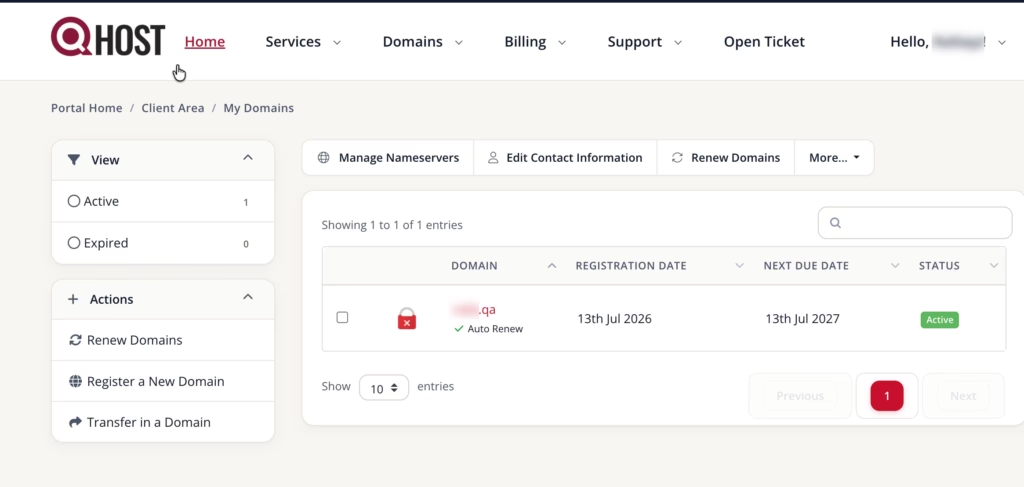
From the main navigation menu, select:
Domains → My Domains
This page displays all domain names registered or managed under your Q Host account.
Screenshot: My Domains page.
Step 3: Select the Domain #
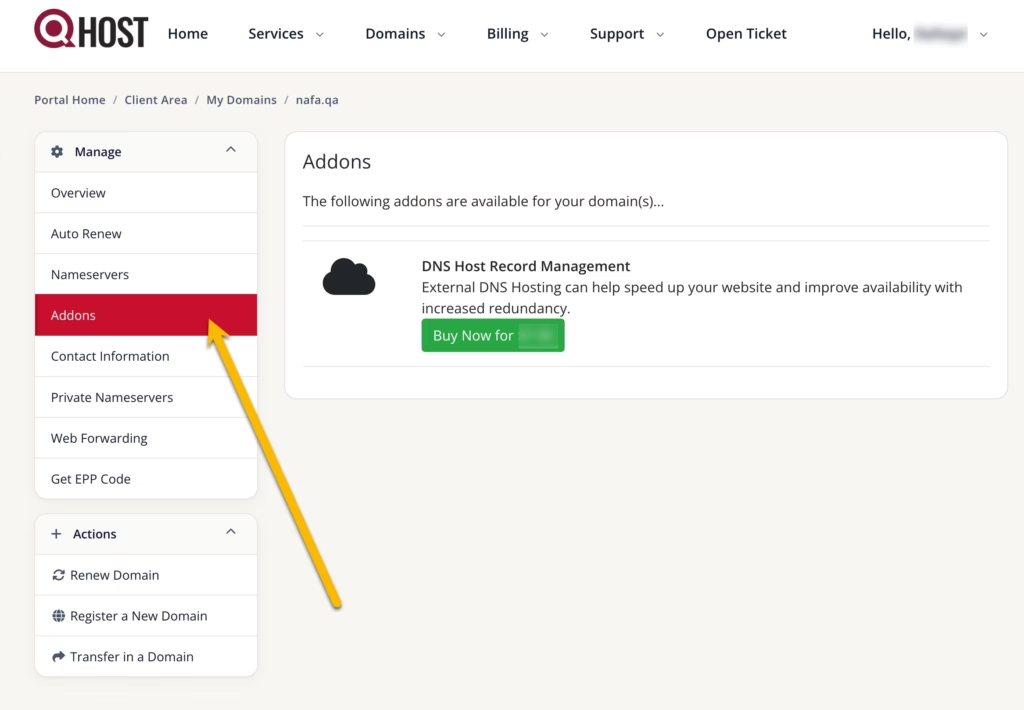
Locate the domain name for which you want to add the TXT record and click on it to open its management page.
From the domain management menu, select Addons.
Screenshot: Domain management page with the Addons tab highlighted.
Step 4: Activate DNS Host Record Management #
Under the Addons section, check whether DNS Host Record Management is active.
If the service is not yet activated, click the available purchase or activation button to opt in. An additional fee may apply.
Once activated, the DNS Management option will appear in the domain management menu.
Activating DNS Management does not automatically change your domain’s nameservers. You must also ensure that the domain is using
ns1.qhost.qa,ns2.qhost.qa, andns3.qhost.qa.
Step 5: Add the TXT Record #
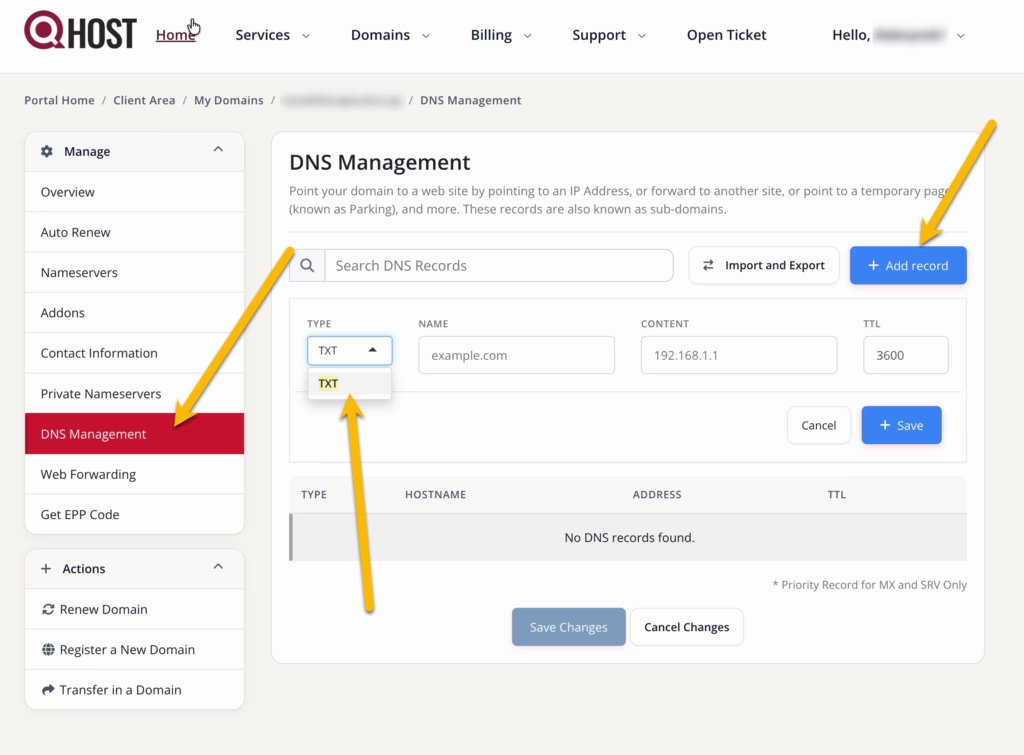
Select DNS Management from the domain management menu, then click Add record.
Complete the record fields as follows:
- Type: Select
TXT. - Name: Enter the hostname or record name provided by your service provider.
- Content: Enter the TXT value exactly as provided by your service provider.
- TTL: Leave the default value in place unless your provider has instructed you to use a specific TTL.
Examples of values that may be entered in the Name field include:
@
_acme-challenge
selector1._domainkey
The required value depends on the service you are configuring. Copy the record exactly as supplied, including any underscores, hyphens, spaces, or verification codes.
Click Save to add the record.
Screenshot: DNS Management page showing the TXT record fields.
Step 6: Save and Allow Time for DNS Propagation #
After adding the TXT record, click Save Changes to apply the DNS zone update.
DNS changes are not always visible immediately. They may begin working within a few minutes or hours, depending on the record’s TTL and DNS caching. In some cases, full propagation can take up to 24–48 hours.
You can then return to the service provider that requested the TXT record and complete its verification process.
Important Notes #
Only add the quotation marks around a TXT value when they are specifically required by the service provider. The Q Host DNS Manager may automatically format TXT records where necessary.
Avoid creating duplicate TXT records with the same name and value, as this may prevent some verification services from completing successfully.
Changing your domain’s nameservers can replace the DNS service currently controlling your website and email. Before changing nameservers, ensure that all required website, email, MX, TXT, CNAME, and other DNS records have been recreated in the Q Host DNS Manager.